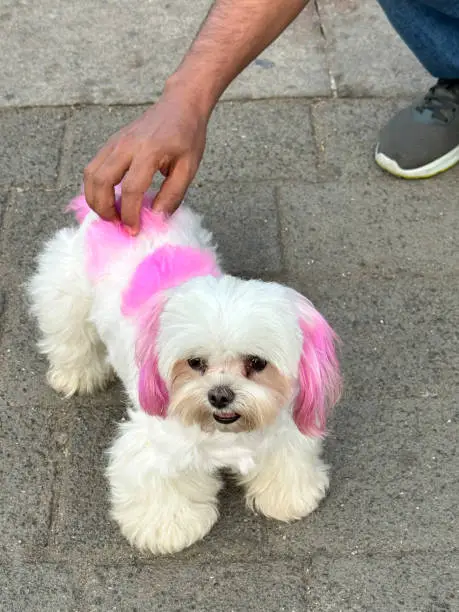
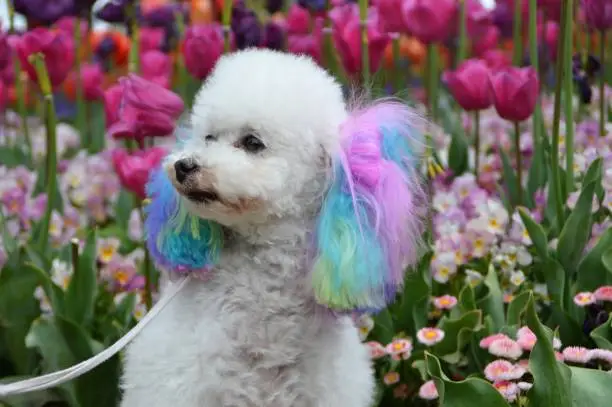
You’re out for a walk and you see it: a dog that looks like it just walked out of a cartoon. Maybe it’s a poodle with a rainbow-tipped mohawk or a golden retriever with a tail dipped in electric blue. It’s impossible not to smile, right? In that moment, you might look at your own four-legged best friend and think, “Wow, Fido would absolutely rock a little bit of colour for Halloween,” or “A bright pink stripe on Luna’s white fur would make her so much easier to spot at the dog park when it gets dark.”
It’s a fun, creative impulse born from how much we adore our pets. We include them in our families, our holidays, and our photos, so why not a little bit of pampering and style?
But then, that nagging, responsible pet-parent voice kicks in. Hold on. Is Dog Hair Dye even safe?
That’s the million-dollar question, and honestly, it’s the only one that truly matters. The answer is a little complex. With the wrong products? Absolutely not. It can be downright dangerous. But with the right knowledge and supplies? It can be a perfectly safe, temporary blast. My goal here is to be your honest friend, giving you the full scoop so you can make the best choice for your pup. We’ll chat about what makes a dye truly pet-safe, how to pick the good stuff, and later, how to actually pull it off without any stress (for either of you!).
1. Safety First: Navigating the World of Dog Hair Dye
Before we even dream about colours and designs, we have to get real about safety. This isn’t about vanity; it’s about well-being. So let’s break it down.
Human Dog Hair Dye is a Hard No. Seriously.
I know it might be tempting to grab that box of permanent black dye from your bathroom cupboard, especially if you’re just thinking about a tiny spot. Please, don’t. This is the single most important rule.
The chemicals in our Dog Hair Dye are brutal stuff. They’re designed for human scalps and are far too harsh for our canine companions. Think about ingredients like:
- Ammonia: That powerful smell isn’t just unpleasant; it’s a sign of a chemical that can literally burn your dog’s sensitive skin.
- Peroxide: Used to bleach Dog Hair Dye, it’s incredibly drying and irritating.
- p-Phenylenediamine (PPD): This is the real bad guy. It’s a common allergen for people, and for dogs, the risk is even higher. If your dog licks it (and they will), it can lead to poisoning. Reactions can range from nasty skin irritation and swelling to something much more serious.
Using human dye on a dog is a one-way ticket to the emergency vet. It’s just not a risk worth taking for a bit of fun.
So, What Does “Pet-Safe” Actually Mean?
Okay, so human stuff is out. What should you be looking for? True pet-safe dye is a completely different product. It’s specifically formulated with a dog’s biology in mind.
Imagine the difference between using a permanent marker on your skin and using a child’s washable paint. One is harsh and permanent; the other is designed to be gentle and temporary. Pet-safe dyes are like that washable paint. They’re typically made from:
- Natural ingredients like beet juice, vegetable pigments, or chamomile extract.
- Non-toxic, food-grade colorants that won’t harm your dog if they manage to lick a bit off.
- Zero nasty chemicals—no ammonia, no peroxide, no PPD.
They’re meant to sit on the outside of the Dog Hair Dye shaft, not penetrate it with harsh chemicals. The best brands are also pH-balanced for dog skin, which helps prevent any irritation.
The Golden Rule: Chat With Your Vet
Even when you’ve found a product that looks perfect, I always recommend a quick check-in with your veterinarian. It’s just a smart move. This is especially crucial if your dog:
- Has a history of skin allergies or sensitive skin.
- Is a senior citizen or a very young puppy (their skin is more delicate).
- Has any ongoing health issues.
Your vet knows your dog’s unique history and can give you the ultimate thumbs up or offer specific advice. It’s a five-minute phone call that’s worth its weight in gold for your peace of mind.
2. Picking the Perfect (and Safe) Product
Now for the fun part: shopping! But the pet aisle can be overwhelming. Here’s how to navigate it like a pro and find a product you can trust.
Become a Label Detective
Get into the habit of turning the bottle around and reading the ingredients. It’s not the most thrilling read, but it’s so important.
Look for: Botanical extracts, mineral-based colorants, and soothing stuff like aloe vera or oatmeal. If it sounds like something you could almost eat, that’s a good sign!
Run away from: Any product that lists PPD, Ammonia, Peroxide, or Parabens. Just put it right back on the shelf.
The Trusty Brands Other Pet Parents Swear By
Luckily, some awesome companies have dedicated themselves to making safe, vibrant colours for our pups. Here’s a quick rundown of the fan favourites:
| Brand | Vibe & Feel | The Good Stuff | Things to Note | Perfect For… |
|---|---|---|---|---|
| Opawz | The Professional’s Choice | Wild, vibrant colours that last. The go-to for groomers who create those insane, show-stopping designs. | Can be a bit more of an investment and needs a careful hand. | Someone who wants a wow-factor look that’ll last for weeks. |
| Warren London’s Critter Color | The Beginner’s Bestie | Super easy brush-on gel. Conditions the coat, smells like vanilla, and is easy to find. | The colours can be more subtle, especially on dark fur. | Your first foray into doggy dye. Low stress and low commitment. |
| Creme Animalin | The Gentle Giant | A super gentle, cream-based formula that conditions as it colours. | Can be trickier to find outside of specialty shops. | Pups with slightly sensitive skin or owners who want a conditioning treatment. |
A Quick Word on Commitment Level
Not all colour is created equal! It’s helpful to think about what you want:
- Semi-Permanent Dye (Opawz, Creme Animalin): This is for a lasting look. It’ll survive several shampoos and is great if you want your dog’s blue tail to be a signature look for a month.
- Temporary Gels & Sprays (Critter Color): This is your “one-and-done” option. Perfect for a birthday party or a holiday parade, it’ll wash out in the next bath.
- Colour Chalks: The ultimate in no-commitment fun. Rub it on for instant colour for a photoshoot, and then brush it right out. Zero stress.
Your Stress-Free Guide to Dyeing & Design Ideas
So, you’ve found the perfect, vet-approved, pet-safe dye and you’re ready to turn your pup into a walking masterpiece. Awesome! Now what? The key to a successful dye job isn’t just the colour—it’s the experience. You want this to be fun, not a furry fiasco.
Think of it less like a chemistry experiment and more like a messy, creative bonding session. With a little prep and a lot of patience, you can create something amazing. Let’s walk through it, step by step.
3. Your Step-by-Step Guide to a Pawsome Transformation
Before you even unscrew the cap, get your ducks in a row. A little preparation prevents a panicked, multi-coloured dash to the sink later!
What You’ll Need: Your Doggy Dye Kit
Gather these supplies before you bring your dog into the mix. Trust me, you don’t want to be searching for a towel with purple gloves on.
- The Star: Your pet-safe dye kit.
- The Essentials: Disposable gloves (unless you want rainbow hands), a few old towels you don’t mind staining, and a brush for detangling.
- The Protector: A tub of Vaseline or petroleum jelly. This is your best friend for keeping dye out of places it shouldn’t be.
- The Motivator: A stash of your dog’s absolute favourite, high-value treats. Think small pieces of chicken, cheese, or hot dogs. This is a bribe—er, a positive reinforcement—tool.
- The Helper (Optional but Recommended): A calm friend or family member to act as a treat-dispenser and head-scratcher can be a game-changer.
Step 1: The Non-Negotiable Patch Test
I know, I know. It’s tempting to skip this. You’re excited! But please don’t. This 24-hour waiting period is the biggest thing standing between your dog and a potential allergic reaction.
- How to do it: Snip a tiny bit of Dog Hair Dye from a discreet spot (like behind the leg or on the belly). Mix a small amount of dye as directed and apply it to both the hair and a tiny patch of skin underneath.
- The Wait: Let it dry and then leave it completely alone for 24-48 hours. No licking, no washing.
- The Check: After the time is up, examine the spot closely. Is there any redness, swelling, bumps, or intense itching? If it’s perfectly clear, you’re good to go! If there’s any reaction at all, wash the area thoroughly and scrap the plan with that product.
Step 2: Prepping Your Pup (and Your Space)
- Brush It Out: Give your dog a really good brush to get rid of any mats or tangles. Dye will stick unevenly to matted fur.
- Skip the Bath: Don’t bathe your dog right before. Their natural skin oils act as a protective barrier. A bath a day or two before is perfect.
- Protect Sensitive Areas: Use your finger to carefully apply a thin ring of Vaseline around your dog’s eyes, mouth, and nose. This creates a barrier that will stop the dye from staining the skin.
- Set the Scene: Choose a well-ventilated, easy-to-clean area. A bathroom or kitchen with tile floors is ideal. Lay down those old towels. Put on your gloves. Get your treats ready. Play some calm music. Set the mood!
Step 3: The Main Event – Applying the Dye
- Follow the Instructions: This seems obvious, but every product is a little different. Their instructions are your bible for how long to leave it on.
- Work in Sections: Don’t just glob it on. Apply the dye evenly to small sections of fur, working it in gently with your fingers or a dye brush. This ensures you get full, vibrant coverage.
- Keep It Superficial: Focus on the top layer of fur. Avoid rubbing it deep down to the skin where it’s more likely to cause irritation.
- The “No-Go” Zones: Be extra careful to avoid the eyes, inside the ears, the nose, and, well, the private areas. If you’re doing the tail, just do the fluffy part, not the base.
Step 4: Rinsing and Revealing the Masterpiece
- Rinse, Rinse, Rinse: Once the time is up, it’s rinse time. Use lukewarm water and keep rinsing until the water runs completely clear. This might take a while, so be patient. Any leftover dye can transfer to your furniture!
- Towel Dry: Gently squeeze the water out of their fur and use your old towels to pat them dry. Avoid using a high-heat Dog Hair Dye dryer, as this can irritate skin and potentially fade the colour. A cool setting is fine if your dog is used to it.
Keeping Your Dog Calm: It’s All in the Vibe
Your dog will feed off your energy. If you’re stressed and frantic, they will be too. Stay calm and make it positive.
- Keep sessions short. If your dog is getting wiggly, take a break. Do one paw today and the next tomorrow.
- Praise and treat constantly. Make it the best day of their life. Chicken for sitting still! Cheese for not shaking!
- Know when to call it. If your dog is truly miserable, it’s not worth it. Wash it out and try again another day with a simpler design or a shorter time goal.
4. Unleash Your Creativity: Fun & Simple Dog Hair Dye Ideas
Now for the inspiration! You don’t have to be a professional groomer to create something adorable. Here are some easy, low-commitment ideas to get you started.
Simple Accents (Perfect for Beginners)
- The Tipped Tail: This is a classic for a reason. Just dip the very end of your dog’s fluffy tail into a colour. It’s subtle, cute, and wags around for everyone to see.
- Ear Streaks: Add a pop of colour to the tips of the ears or paint a few streaks along the fringe. It looks fantastic on floppy-eared dogs.
- Painted Paw Pads: This is a super subtle one. Carefully colour the fur on the bottom of the paws. It’s like a fun secret when they roll over!
Full-On Fun Patterns (For the Ambitious Artist)
- Polka Dots: Use the end of a paintbrush or a cotton swab to create perfect little dots along their back or side.
- Animal Prints: Leopard spots or tiger stripes are easier than they look! Use a small brush to create irregular shapes and outlines.
- Stencils: This is the ultimate cheat code. You can buy pet-safe stencils (hearts, bones, stars) or even make your own with cardboard. Hold it against the fur and spray or brush over it.
Seasonal & Holiday Themes
- Halloween: Orange tips for a pumpkin vibe, or go for a spooky black-and-green combination.
- Christmas: Green and red accents on the tail, ears, or as a cute holiday pattern on their side.
- 4th of July: Go for red, white, and blue streaks for a truly patriotic pup.
- Easter: Soft pastels like pink, blue, and yellow are perfect for spring.
Visibility & Safety Hack
This is a genuinely practical reason to use colour! A bright splash of pet-safe dye on the tip of the tail or on the back of the hind legs can make your dog much more visible to cyclists and drivers during those early morning or late evening walks in the winter. It’s a stylish safety feature!
Your Questions Answered & How to Nail the Look
By now, you’re basically a pet-safe dye expert! You know the rules, you’ve got the product, and your creative juices are flowing. But Dog Hair Dye it’s totally normal to have a few last-minute questions buzzing around before you take the plunge.
Let’s tackle those head-on. Think of this as our quick-fire, honest chat about all the little things you might be wondering.
5. Addressing Your Concerns: The Big Dog Hair Dye FAQ
Q: Will this hurt my dog?
A: This is the big one. Using a true pet-safe dye should not hurt your dog at all. The process might feel a little weird or cold for them, Dog Hair Dye, but it shouldn’t be painful. The goal is a calm, positive experience. If your dog seems to be in pain or significant discomfort, stop immediately. This is usually a sign of a product that isn’t agreeing with them or that something else is wrong.
Q: Okay, but how long is this going to last?
A: It totally depends on what you use! This is the fun part—you can choose your commitment level.
- Semi-Permanent Dyes: These are the long-haulers. Brands like Opawz can last through 3-6 shampoos, often staying vibrant for a month or more as the colour gradually fades.
- Temporary Gels & Sprays: These are your weekend warriors. They’ll last until your dog’s next bath. Perfect for a single event or photo shoot.
- Colour Chalks: The ultimate in “one-and-done” colour. It brushes right out, sometimes even before the next bath. Zero commitment.
Q: Can I just use food colouring? It’s natural, right?
A: I get why this is a popular DIY idea. It’s in your kitchen, it seems harmless. And while a tiny bit likely won’t hurt your dog, it’s not the best plan. Here’s why:
- It stains like crazy. Food colouring is designed to dye things permanently. You might end up with a pink dog and a pink bathroom for a lot longer than you intended.
- It’s unpredictable. The colour might not turn out how you expect, especially on darker fur.
- It’s messy. It doesn’t have the thickening agents that pet-specific dyes do, so it runs everywhere.
While it’s probably not toxic in a small amount, commercial pet-safe dyes are just a more reliable, easier, and better-formulated option.
Q: Is it safe to Dog Hair Dye a puppy or an older dog?
A: This is a case where it’s best to be extra cautious. Puppies have incredibly sensitive skin that’s still developing. Older dogs can also have more delicate skin or underlying health issues you might not be aware of. The general recommendation is to avoid dyeing very young puppies (wait until they’re at least over 6 months old) and to get a very clear all-clear from your vet for senior dogs. Their comfort and safety trump a fun colour every time.
Q: Oh no, my dog is having a reaction! What do I do?
A: First, don’t panic. This is why we do the patch test! But if a reaction happens during the full application, here’s your game plan:
- Stop immediately.
- Rinse the area thoroughly with copious amounts of lukewarm water to get all the dye off.
- Give your vet a call. Explain what product you used and describe the reaction (redness, hives, itching). They will give you the best advice on whether you need to bring them in or if you can manage it at home with a soothing bath.
This is a rare occurrence with proper products, but it’s always best to know what to do.
Conclusion: Safety, Fun, and Fabulous Pups on Dog Hair Dye
We’ve covered a lot of ground together! From the initial “can I even do this?” to picking products and brainstorming fantastic designs, the core message has always been the same: your dog’s well-being is the number one priority.
The world of dog hair dye is all about creative expression and having a bit of fun with the furry family member you love. It’s a way to make them visible, celebrate a season, or just make people smile when they see your technicolor terrier trotting down the street.
But that fun should never, ever come at the cost of their health. It’s a privilege that comes with serious responsibility.
So, let’s do a final, quick checklist before you start:
- Vet Check: Got the all-clear from your dog’s doctor? Check.
- The Patch Test: You waited 24-48 hours with no reaction? Check.
- Pet-Safe Products: Your dye is specifically formulated for dogs, free of nasty chemicals? Check.
- Positive Vibes Only: You’ve got your treats, your patience, and you’re ready to make it a good experience for your pup? Check.
If you’ve got all that, you’re all set. Go forth and create something amazing! We’d absolutely love to see your safe and stylish creations. Share your photos online and tag your favourite pet communities to spread the joy.
And if you ever feel even the slightest bit unsure, Dog Hair Dye there’s zero shame in calling in a professional groomer who specializes in creative colour. They can work their magic and ensure everything is perfect.
For the most authoritative information on animal care and safety standards, the American Veterinary Medical Association (AVMA) is an invaluable resource for all pet parents. Learn more on their website here.